How to Enable Maintenance Mode in OpenCart
- OpenCart Tutorials
- OpenCart Admin Help
- 19th December 2016
- Abigail
There are lots of reasons why ecommerce store owners need a way of closing their store for a short time. Whether your team are taking a few well-deserved days off over the Holidays, or you're making some essential repairs to your store, it's vital that you and your employees can quickly put your store into maintenance mode.
With OpenCart, you don't need any previous development knowledge in order to put your store into maintenance mode - just a simple flick of a switch and you're done. This tutorial will work for any version of OpenCart.
Enabling Maintenance Mode in OpenCart
To turn maintenance mode on, you'll need to log into your OpenCart store's admin area and navigate to System > Settings and edit your store's settings. In the Server tab, you'll see the Maintenance Mode setting under the General section - this section will be lower down in older versions of OpenCart, but it'll still be located in the Server tab.
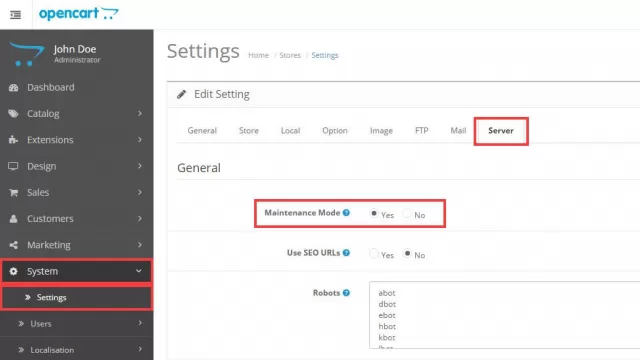
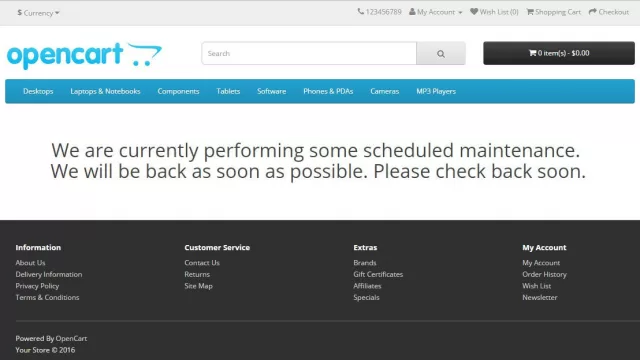
Once you've changed the maintenance mode setting from 'No' to 'Yes', click save and your store will now show the below message on your store front to customers. You won't see this message when signed into your admin area (see below), so ensure that you log out of your admin area or view your store front in a private browser to test it.
Editing your store when in Maintenance Mode
OpenCart's cleverly designed system allows you to view and edit your store even when maintenance mode is enabled. To do so, simply log into your store's admin area and then view your store front using the same browser. Using this feature, your ecommerce team can tweak, edit and fix any issue on your store quickly whilst ensuring that it doesn't affect your customers in any way.